Wednesday, September 5, 2012

Lesson 7: Taking Advantage of Classes

Deprecation Notice:

I've been updating the lessons now that SDL2 is officially released, please visit my new site on Github that has updated lessons and improved code.


If you recall from the previous lessons we've used a global SDL_Window and SDL_Renderer so that we could access them from within our various functions throughout main.cpp, however using non-constant globals is a very bad idea, and when we start wanting to write more complicated programs this method will become unusable.

In this lesson we will look to object oriented programming to resolve these issues and put together a useful class to represent our Window that we can use for loading and drawing images and text. In addition to this we will discover SDL's more powerful rendering function, SDL_RenderCopyEx, which will allow us to specify rotations about points and flips to apply to the texture when it's drawn.

For this lesson you'll need to have at least some knowledge of C++ classes along with the C++11 std::unique_ptr, as we will be using both throughout the lesson.

Before we jump into coding we'll need to have a plan of how our class looks and how we want it to be used. For simplicity I've chosen to make all members of the class static, which enables us to call the functions on our window from anywhere in the program that includes its header file. It would be undesirable to do this if you plan to use SDL 2.0's new ability to support multiple windows, but for now this method will be acceptable.

Now we can move on to planning out individual functions for our class. Obviously we'll want to bring in our ApplySurface, LoadImage and RenderText functions from the previous lessons. In addition to this we will need some sort of initialization and quitting functions to create and close the window and start/exit SDL and SDL_ttf. We'll also need to be able to tell the window when to clear and present, and it would be useful to get the window's width and height, so we'll make a function for that as well.

So here's what we've got planned out for the Window class:

Where I've included the appropriate header guards and renamed ApplySurface to Draw and omitted most of its parameters as they'll be a good bit longer now that we also need to pass a rotation angle, point of rotation and flip to SDL_RenderCopyEx.

This looks pretty good for a simple Window class, so lets start turning it into real code.

The first thing I want to cover is how we'll be handling our SDL_Window and SDL_Renderer. Instead of using a raw pointer and calling SDL_DestroyX in the Quit function, we'll be using a new C++11 feature known as the std::unique_ptr. This pointer is included in the <memory> header and allows for use of lifetime managed objects. In the case of the unique_ptr it allows for only one pointer to use the object at a time and once that pointer goes out of scope it will call the destructor function chosen for the pointer, freeing the memory automatically.

It's easy to see how this unique_ptr can be useful, we don't need to worry about managing the objects memory and we don't need to worry about it not being freed in the case that an error arises. Suppose in our program we were to hit some runtime error and crash out of a function or the whole program without calling the necessary memory releasing functions. The memory would never be freed! However with a unique_ptr it would go out of scope, calling either the default destructor of the object, or a specified function passed to it to clean up the memory. Very handy indeed!

This is not to say that the new unique_ptr, shared_ptr and weak_ptr are a magical band-aid to resolve any memory issues in C++11 as they most certainly are not. Raw pointers still have their place and misuse of the new types will still result in memory issues. It's important to use the appropriate type for the application. In this case the unique_ptr is an excellent choice for our use.

Since we want to use the SDL_DestroyX function instead of the object's destructor to free the managed object, we need to specify the function signature of  the desired destruction function to our unique_ptr, which in this case is the signature for SDL_DestroyX, which is void(*)(SDL_X*). So mWindow and mRenderer will end up being:

Now that we know how mWindow and mRenderer will be implemented we can move on to writing our functions, and declaring the static member variables in window.cpp.

First, the declaration of our variables: mWindow, mRenderer and mBox.

It looks a bit messy, but it really isn't so bad. We simply set our unique_ptrs to be pointing to the appropriate destructor function and set the data to nullptr.

As mentioned earlier, our constructor and destructor do nothing, so we'll skip covering writing those, as there's nothing to write and jump into putting together our Init function.

For Init we just want to start up SDL and TTF and create our SDL_Window and SDL_Renderer, so we just want to take lines 75-97 of Lesson6 main.cpp and put them into their own function, and allow for a string to be passed that will be set as the window title. Simple enough! So our function definition will look like:

Where I have used doxygen style comments, to enable usage of doxygen to generate easy to understand documentation for the code. Our implementation of the function is simply lines 75-97 of the previous lesson:

This function should look very familiar, the only difference being that we use the unique_ptr reset function to change the data that it points to, instead of the previous methods used. In this case we simply change the nullptr they're currently managing to the created SDL_Window or SDL_Renderer that they should be managing.

The Quit function is very simple, we just take the SDL_Quit and TTF_Quit calls and put them into the function.

The most changed function is our former ApplySurface function (now named Draw), which we'll need to rework to enable us to pass the extra parameters needed by SDL_RenderCopyEx. If we take a look at the documentation for the function we can see that in addition to a texture pointer, destination rect and clip rect we need an angle (in degrees), a pivot point and a flip value.

So now we know what we need, and can write the function, however I've chosen to pass the pivot point values as separate ints instead of an SDL_Point, in the future we'll create a 2d vector class and use that instead, which will also enable us to perform more advanced vector math. So our function will look like so:

Be sure to note the default parameters we've chosen, if we pass just a texture and destination, we'll get an upright drawing of the texture within the destination rectangle, with the rest of the parameters defaulting to no change.

Our function is quite easy to write as it's simply serving as a wrapper around SDL_RenderCopyEx, with one extra thing. For simplicity we want the pivot point we pass to be relative to the center of the dstRect, while SDL will consider the point relative to the texture's X and Y coordinates, so we must add an offset to center it. Alternatively, if NULL is passed as the SDL_Point* parameter it will set the rotation about the destination rect's center.

There's one other new thing tucked away in the call to SDL_RenderCopyEx, which is that in order to access the raw SDL_Renderer pointer that the function expects we use mRenderer.get() to get it from the unique_ptr.

Next we define our LoadImage and RenderText functions:

I leave writing the function to you as it's the same as the definitions in Lesson 7 with the small change to passing mRenderer.get() in place of renderer.

Finally we define our Clear, Present and Box functions. Clear simply calls SDL_RenderClear on mRenderer and Present does the same for SDL_RenderPresent. Box lets us return an SDL_Rect containing the window's width and height, which we can query using SDL_GetWindowSize. Our functions will look like:

If you have issues working out the class, my implementation can be found at the Github repo, window.h and window.cpp. Now that we've got our Window class written, it's time to try it out in an application and make sure it works.

In main.cpp we now will also need to include our window header, "window.h" in order to use the class. Instead of calling SDL_Init and etc. as done previously we can now call Window::Init and catch any errors it may throw to create our window and make sure it went ok.

We can then load images and render text using the LoadImage and RenderText functions from our class.

Here we also perform error catching to respond appropriately to any errors that may be thrown by the functions. Now we can make use of our Box function to find the center of the window and set a position rect to draw our image and text too.

In addition we create a variable called angle so that we can test out drawing things with some rotation. To change the variable we add some keydown checks to increase or decrease the value of angle.

Finally we can use the new Window functions to Clear, Draw and Present our screen with a simple call:

And before exiting the program, we simply call Destroy on the textures and Window::Quit to exit SDL and TTF.

Lesson 7 Extra Challenge!

Make it possible to set the window width and height when calling Init
Hint

End of Lesson 7

Thanks for joining me! See you again soon in Lesson 8: Timers.


Saturday, August 18, 2012

Lesson 6: True Type Fonts with SDL_ttf

Deprecation Notice:

I've been updating the lessons now that SDL2 is officially released, please visit my new site on Github that has updated lessons and improved code.


In this lesson we will start learning how to use the SDL_ttf library to render text using True Type fonts. For this lesson you'll need the SDL_ttf library which you should have from when you downloaded and compiled all the libraries on SDL2.0 Mercurial. If you don't have the SDL2.0 version of SDL_ttf, you should download and compile it now. The library is linked up the same as SDL_image was in Lesson 3.

In addition to the library we'll need a true type font to use to draw our text. It's important that you're careful when choosing a font as many fonts are proprietary or have rules about using them in software, and if used without the proper licensing can result in a nasty legal mess. Fortunately for us there are many excellent open fonts available online. For this lesson we'll be using a set of open source fonts recently released by Adobe which you can download directly from sourceforge, the specific font I chose for this lesson is SourceSansPro-Regular, but you can use any font you like.

 Now that we've got our font downloaded and libraries linked up lets take a look at how we can work with fonts via SDL_ttf. The library provides functionality for opening and closing TTF fonts and rendering text to SDL_Surface pointers. The library also lets us specify the color and font size we'd like to use when rendering the text. You can find the full library documentation here.

First we'll need to add SDL_ttf.h to our includes:
In order to use the library we need to initialize it in our main function after initializing SDL. Note that we check for errors similar to how we check for issues when starting SDL, except that now to get the appropriate error information we use TTF_GetError, similar to what we did in Lesson 3 to get SDL_image error information.
Next we'll want to make a function to render a message and abstract away the work that goes into it, and simply return an SDL_Texture that we can draw to the screen. In addition to rendering the message the function will also need to convert the SDL_Surface pointer returned from TTF_RenderText_X to a SDL_Texture pointer and return that.

The information needed to render the message is the message itself, a font file name, a font size and a font color. We can now add a nice function to render our desired message to our code:
That's quite a bit of code! Lets step through it and figure out exactly what's going on. First, we know that we need a message, font file, font color and font size so that we can properly draw our message. SDL provides the SDL_Color structure that is used for specifying what color we want and takes three values for RGB which can each range from 0-255.

The first step in drawing the text is to open our font, which we do on line 4 using TTF_OpenFont, which takes the font file and the font size to open the font as. Note that the same nullptr error checking that we've used before in LoadImage is used to make sure the font opened ok. If it fails we throw an error and include the font file name that caused the error along with TTF_GetError so that we can have enough information to diagnose the issue.

If the font loaded ok we use TTF_RenderText_Blended to write the message to an SDL_Surface and get the pointer back. There are a few methods provided by SDL_ttf for rendering text, blended is the slowest but provides a nice smooth look. The other methods can be found in the documentation linked above.

However because we use SDL_Textures in our rendering we need to convert the surface over. This isn't too difficult because we've made our SDL_Renderer a global and so it's easy to pass it into the function SDL_CreateTextureFromSurface. After creating the SDL_Texture we need to clean up things we no longer need to keep in memory, the SDL_Surface and the TTF_Font. We free the surface the same as before and can use TTF_CloseFont to close the font we opened.

Once everything is cleaned up we return the SDL_Texture pointer for usage in the program.

When we want to render some text in our program we can now perform a call like so:
Here we render the message "TTF fonts are cool!" using the font we downloaded above in white with a font size of 64.

You can then treat the texture as any other texture and draw it the same as we've done previously with our ApplySurface function. If you draw the message centered, you should see something like this when you run the program:
Try playing around with the other TTF_RenderText_X functions and see how they look!

End of Lesson 6

Thanks for joining me! I'll see you again soon in Lesson 7: Taking Advantage of Classes.

Thursday, August 2, 2012

Lesson 5: Clipping Sprite Sheets

Deprecation Notice:

I've been updating the lessons now that SDL2 is officially released, please visit my new site on Github that has updated lessons and improved code.


It's very common in sprite based games to use a large image file containing many smaller images, such as tiles for a tileset, as opposed to having a separate image file for each tile. This type of image is known as a sprite sheet, and is very useful because we don't need to have a separate image file for each image in the game but instead can just draw the subset of the sheet that we want.

In this lesson we will learn how to use a simple sprite sheet in our program and how we can specify the desired subset, known as a clip, to draw. The sprite sheet for this lesson is a simple one containing four circles:
In a sprite sheet images are divided up into sections of some sort of basic shape that we can clip. In this sheet each circle is within a 100x100 rectangle that we can pick to draw, instead of the entire image.

The code from this lesson will be building upon the code from Lesson 4, if you haven't done Lesson 4 you should head back and do it. If you already know the material covered in Lesson 4 grab the code and let's get started.

Within our ApplySurface function from Lesson 4 you'll notice that there's one last NULL value being passed to SDL_RenderCopy.
This parameter is the source rect, more commonly known as the clip, and specifies a sub-rectangle of the image to draw, ie. the clip's position, width and height. In order to pass a clip for the image we'll want to add a clip parameter to ApplySurface.

But what if we had an image where we did want to draw the whole thing? Instead of forcing ourselves to pass a clip of the whole image, we can instead specify a default parameter and detect when we get it. We'll take the clip parameter as an SDL_Rect pointer with a default value of NULL, that way if no clip is passed we can still pass the parameter to RenderCopy and the call will be the same as it was previously when we passed NULL to draw the whole image.

We'll also want to add one more thing to our function: If we pass a clip parameter we clearly would want to use the clip's width and height as our destination values instead of the whole texture's width and height. If we used the texture's width and height our clip would be stretched to match the size of the original texture.
We'll load our image the same as before with or LoadImage function.

We now need to set up our clip rects, which we'll store inside an array. Instead of typing all of our clips out by hand which is very tedious for images with lots of clips, we can take advantage of the pattern in which our image file is constructed to automate the creation of the clip rects with a for loop. If you did the extra challenge from Lesson 2 this method should look quite familiar.

First we specify the width and height each clip should be, in this case 100x100 and we create an array to store four SDL_Rects to hold our clips. Next we use our knowledge of the arrangement of our clips to create a for loop with a column counter to appropriately set the x,y coordinate for each clip.
If you didn't do the Lesson 2 challenge or are feeling a bit lost, let me explain how this works. We want to create four clips, so we set our loop to run four times, from zero to three to match the array indices. We also need to track which column we're going down so that we can correctly set the x coordinate for our clip, we'll begin with column zero and will increment the column value when we move over, which would be at the third clip, ie. i % 2 == 0 since we start counting from zero. We also want to make sure we don't increment column when we first start out, because 0 % 2 is also 0, so we put a condition to ignore that case.

Now we'll want to calculate the x and y coordinates for our clip in the image. We want to increment the x coordinate by the image width each time we move over a column, and increase the y each time we move down one in the column. The x coordinate setting should be clear, we can just use tile width * column. The y coordinate setting uses our current loop iteration mod the number of clips per column to determine which row we're on. We then multiple this row number by the tile height to get the location in pixels. The width and height are uniform for all clips so we can just set them, without any extra calculations.

Thus when we run this loop we will create four clips and each clip will take the appropriate coordinate for the sub-rectangle. Still not sure how it works? Try running the for loop in your head and calculating the column, x and y values for each iteration and see where they line up on the sprite sheet.

The last step is to set a value which can track which clip we want to draw, in this case an integer corresponding to the clip's index in the array. Let's begin by drawing clip 0.
Before beginning our main loop we'll also need to set an x and y position to draw the image at. I chose to calculate the center position for the image using the same method as in previous lessons. We'll also want to create a bool quit variable and an SDL_Event.

In order to make sure our clips were set correctly and display correctly we'll want to be able to draw each one individually, to do this we can set up some event polling to change the value of useClip so that we can draw each clip.
Here we check if the input type is a key down event, and then use a switch statement on the key symbol to pick the appropriate response.

Finally in our render section we clear the screen, pass the clip's value to our ApplySurface function in the rendering section of our loop:
And finally, present the renderer to display the changes.

When you run the program you should be able to push the number keys 1-4 and see the different colored circles appear individually on screen!

End of Lesson 5

Thanks for joining me! I'll see you again soon in Lesson 6: True Type Fonts with SDL_ttf.

Monday, July 23, 2012

Lesson 4: Event Driven Programming

Deprecation Notice:

I've been updating the lessons now that SDL2 is officially released, please visit my new site on Github that has updated lessons and improved code.


Now that we've learned how to draw images to the screen it's time to learn how to read user input. Our game won't be very good if there's no way to play it! In this lesson we will cover simple event handling using SDL and begin designing a primitive 'main loop'.

Before we begin it's important to mention that the majority of the code being used for this lesson is the code that we've built up from previous lessons, and as such the repeated code will not be shown as it is assumed you have it already and  are using what you're learning here to add on to the previous lesson's code. If you don't have the code, head back to the earlier lessons, or if you already understand the material grab the code from Lesson 3 off Github and let's get started modifying it.

We'll create the renderer and window the same as before, and our LoadImage and ApplySurface functions remain unchanged. The first change to our program is the loading of a different image, note that you will need to change the filepath to match the location of the image relative to the executable on your system, or the program will fail to run.
We also use the same equation as before for centering our image in the window. For this lesson our image will be:


Now before we dive into writing our main loop and event handling code, we'll want to get an understanding of how the SDL event system works.

An event is any interaction with the program done by the user: keypresses, mouse motion, mouse presses, joystick movement, window resizing, minimizing or closing, etc. SDL provides a structure for storing these events called SDL_Event. Let's create one now.
Whenever an event occurs it's added to the queue in chronological order. If we want to read an event from this queue we can pull the oldest event using SDL_PollEvent. This may be a bit confusing, hopefully this handy graphic will help make it a bit clearer.


So in this case the user resized the window, then clicked the mouse, then pushed a key. When we call SDL_PollEvent on this queue it will get the event that happened first, or the oldest event, and put it into our SDL_Event structure so that we can look at the event data in our program.

So if each frame of our game we want to process all events in the queue we'll want to loop through until there's nothing left to read, then continue on and do our other stuff like logic and rendering. This is starting to sound like something we could call our main loop!

In each iteration of the loop we'll want to process our event queue, do some program logic and draw the frame and then do it all over again until the user quits.
Next we'll want to do our event polling. Our goal was to run over all the events in the queue each frame, so let's use another while loop, as PollEvent will return 1, 'true', if there are any pending events, so our loop will run until there are no more events in the queue.
First we get an event from the queue with SDL_PollEvent, which we pass an address too as its signature is SDL_PollEvent(SDL_Event*) and then we do whatever we want to with the input. In this case we're just going to quit the program if the user pushes any key, clicks the mouse or closes the window, so if just about anything happens we set quit to true. Note that clicking the X on the window is read as SDL_QUIT.

SDL's event structure is able to read many different types of events and provides all the valid information tied to each event that may be needed in deciding what to do with the input. For more information on the various event types and the data that comes with them, check out the SDL_Event documentation.

The next step in our loop would be to do various calculations that our program needs to do, such as determining movement, collision outcomes and etc. However since our program is very primitive we don't need to do any logic at the moment, so we'll continue on to rendering.
The code is identical to before, but we must be sure each time to clear the screen before drawing our new scene or we could have images left over from previous frames start showing up.

You'll want to wrap up the program by destroying the texture, renderer and window and quit SDL.

When you run the program you should be able to quit by clicking the X on the window, clicking in the window or pressing a key while the window is selected. You may also notice something a bit interesting when running the program if you check its CPU usage. If you've seen tutorials where the main loop is discussed or have written SDL1.2 code you'd expect that our program for this lesson would max out one of your CPU cores because there's no framerate limiting being done. This is no longer the case with our program as we have created our renderer with the SDL_PRESENTVSYNC flag which tells the renderer to delay and match the framerate of our monitor, letting SDL take care of the framerate limiting for us, and letting us skip writing a line or two of code.

Lesson 4 Extra Challenge!

Try getting the image to move on the screen.
Hint

End of Lesson 4: Event Driven Programming

Thanks for joining me! I'll see you again soon in Lesson 5: Clipping Sprite Sheets

Thursday, July 19, 2012

Lesson 3: SDL Extension Libraries

Deprecation Notice:

I've been updating the lessons now that SDL2 is officially released, please visit my new site on Github that has updated lessons and improved code.

You may have been wondering throughout the previous tutorials if it is possible to load images that aren't BMPs. Although SDL does not provide functionality for loading non-BMP images itself, there exists a large amount of robust and powerful libraries that extend SDL's functionalities to include loading many image formats via SDL_image, rendering true-type fonts with SDL_ttf, support for more audio formats with SDL_mixer and even networking from SDL_net.

By using these libraries we can add much more functionality to our programs and do many things much easier. For now we will only be using SDL_image, but will cover the other extensions in later lessons.

In Lesson 0, when you cloned from the Mercurial and built the libraries you should have also downloaded and built the source for SDL_image, SDL_ttf and SDL_mixer, although I was unable to get SDL_mixer to compile with Visual Studio at the time of writing. This part of the tutorial will be updated when SDL 2.0 is officially released to simply contain links to download the libraries.

If you have not done this, head over to the SDL Mercurial and clone and build the extension libraries available there.

To include the headers and library files on Windows simply paste them in the include and lib directories of your SDL 2.0 folder and add SDL_image.lib and etc. to your linker settings. On Linux following the configure, make, make install pattern will spit out a location where the libraries were installed that you can link against.

In addition to setting up the includes and libraries you will also need to put the dlls that are located in the externals folder along with the dll that was created when building the project. Some dlls are dynamically loaded and as such, only needed if you intend to use their functionality, you may consult the extension library page for the specifics on which dlls behave this way.

In addition to exploring the SDL_image library in this lesson we will also begin to learn about throwing and catching exceptions by adding some error handling to our LoadImage function from last time, instead of checking if the returned pointer was still null. This will allow us to get more information about the exact error that happened and help us track down the cause of the error faster.

For this lesson we will simply be adding some extra stuff to the code we wrote in Lesson 2, so let's get that open. IDE users will want to add SDL_image to their linker settings as described above, and for those of you compiling with g++ add -lSDL_image or -lSDL2_image depending on how your 2.0 libraries are named.

We'll need to add the extra includes for the new things we want to use, SDL_image and stdexcept.
From here we setup as before our screen parameters and create a global window and renderer. If you're feeling ill from the use of global objects you may want to take a moment.
Now let's rework our LoadImage function to use SDL_image's IMG_LoadTexture to directly load a texture from an image. SDL_image supports many image formats: BMP, GIF, JPEG, LBM, PCX, PNG, PNM, TGA, TIFF, WEBP, XCF, XPM, XV and as such is a very powerful and useful library, as we are no longer limited to the BMP format

Reworking our function is surprisingly simple, we just take out the SDL_Surface business and load the texture directly. Note that we now use IMG_GetError() instead of SDL_GetError(), this is because we're now using the SDL_image library to load the image, and as such the appropriate error information would be stored there instead of in SDL.
But we've got one more new thing here. Since we've decided to be smart and add more informative error checking if our image fails to load we will throw a runtime_error which will tell us what happened and more helpfully, which image caused the error. However if you leave this error uncaught when you call the function later in your program and it occurs, it will crash the program. Depending on the situation this may be desirable, but at the moment we'll want it to tell us what happened as opposed to just crashing.

We're almost ready to draw our images, for this lesson we'll be using this image as our background:
and our foreground image will be:

If you look at our foreground image you'll notice that it has a transparent background, I've set it like this to demonstrate that IMG_LoadTexture will respect alpha channels and that when the texture is drawn the transparent properties will be retained.

Now that we've got our images we can write our loading code, but recall that we'll need to add a try/catch structure to handle the error if one is thrown. Also, don't forget to set the file paths to match the image locations on your system.
In our catch statement we tell the program to print out e.what(), which will display the string that we put into the runtime_error's parentheses. Note that depending on how you've configured your project to build you may not get stdout displayed, if that is the case you can simply write the information to a file instead.

The rest of the code is not shown as it is identical to what was written for Lesson 2, so you can just drop in this new functionality into the old program. If you want to mess with the image positions, feel free to play around. When running the program with the same position settings as Lesson 2 you should see this:

Note that the transparency of the foreground image was preserved. This is a very useful effect as it means we won't have to use color keying to cut out the background of our images but instead can use simple transparency. However if you do wish to use color keying, it will be covered in later lessons.

End of Lesson 3: SDL Extension Libraries

If you have issues compiling or running the code make sure that you've added the include paths and linker settings correctly, along with putting the dlls from SDL_image and its dependencies, located in the externals folder of the source code, into the same folder as your executable.

I'll see you again soon in Lesson 4: Event Driven Programming!


Wednesday, July 18, 2012

Lesson 2: Don't Put Everything in Main

Deprecation Notice:

I've been updating the lessons now that SDL2 is officially released, please visit my new site on Github that has updated lessons and improved code.

In this lesson we will begin organizing our code from the previous lesson by writing some very useful functions, along with discussing how images are positioned and scaled in the SDL window.

As always we'll need to start our program off by including SDL. We'll also need the string class in this lesson so we include that as well.
We'll also declare some constant values for our screen width and height along with global declarations of a window and renderer so that they're accessible by our functions. Again we initialize the pointers as nullptr for safety. If you're not using C++11 initialize them as NULL.

Note: You should avoid using non-constant global values or global values in general as much as possible, ie. you should never ever declare a global SDL_Window or SDL_Renderer. However, for this simple lesson we'll let it slide. But it's ok if you feel grossed out. We'll cover a solution to global objects in a few lessons.

Remember from Lesson 1 where we loaded a texture? It wasn't so bad to just have it in main for loading one image, but what if we had lots images to load? We'd have to type it out every time! We can do much better, instead let's define a function for loading textures from a filename:
The function here should look very familiar as it's the exact same code we wrote in Lesson 1, but now we have wrapped it up in a nice function. With this function we can pass a file name as a string and get back a pointer to the loaded SDL_Texture. Note that the pointer will be nullptr if the loading fails because we initialize both pointers as nullptr for error checking.

Next we'll want to write a function to simplify our draw calls and also allow us to specify a position to draw the image too on the screen. We'll want it to be able to take an x, y coordinate position along with a texture pointer and a renderer pointer and then draw the texture to that position.
In order to specify a position for the texture to be drawn too we need to create a SDL_Rect that we can pass the address to SDL_RenderCopy's destination rect parameter. This is done because the last two parameters of SDL_RenderCopy are SDL_Rect pointers, so it's expecting an address.

To create our rectangle we take the x and y values that we passed in and the set rectangle's values equal to them. However we must also specify the width and height we want the texture to be drawn with as SDL 2.0 also gives us the ability to scale our textures. Try playing with the width and height values once the tutorial is done and see what happens!

For now we just want to pass the texture's width and height so that we draw it at a 1:1 scale. We can get these values by using SDL_QueryTexture. This function takes the texture pointer we want to query, the two parameters we pass NULL to are the format and access level parameters respectively, which we can ignore. Finally we must pass the addresses of the variables that we want to fill with the width and height of the texture.

Now that we've got our SDL_Rect set up we can pass it, along with the renderer and texture as before, to SDL_RenderCopy so that our texture will be drawn at the point specified and with its original width and height. The remaining NULL parameter in this function is for taking a clip of the source texture, which we'll cover later.

Let's see our functions in action. First we've got to start up SDL and create our window and renderer as before. We've also got something new here, SDL_WINDOWPOS_CENTERED. This is an option we can use when creating our window to tell SDL to center its position on the specified axis, here we do it for x and y.
Now let's load up our images. For this lesson we'll be drawing a tiled background image and drawing a centered image on top of it. Here's our background:

And this will be our foreground image:

Let's load them up with the LoadImage function we just wrote.
Note that you will have to change the file paths to match the relative location of the image to the executable on your system.

Before we draw the images we'll need to know where we want to position them, specifically how we'll tile our background and also how we can draw the foreground image centered on the screen. First we'll have to understand how SDL's coordinate system works, as it is a bit different than the standard 2D Cartesian coordinate system. SDL's coordinate system looks like this:
With 0, 0 being in the top-left corner of the screen. Y values increase as we move down the screen and X values increase as we move to the right on the screen. Another thing to note about SDL's coordinate system is that the x, y point specified to draw an image at is used as the location to draw the top-left corner of the image, as opposed to the center of the image like some other libraries.

Before we draw: A note about SDL's drawing order: The order in which things are drawn will be the order in which they sit on top of each other, so the first thing drawn is the bottom-most image, and the last image drawn will sit on top of everything.

If you've taken a peek at the background image yet you'll have noticed that it has a width of 320 and a height of 240, with a screen that is 640x280 we'll need to draw the background image four times to tile it over the window scooting it over by its width or height each time.

Before drawing anything, we'll want to clear the screen, next we'll want to setup the positioning of elements on the window. We can get the width and height of the image again by using the QueryTexture function on the background, this gives us a more versatile method in which we could instead create a for loop to iterate over the positions based on the image width and height, perhaps if we were placing many small tiles. For this case we're only drawing it four times, so we can take the 'dumb' route and just type it out.
Now we want to draw our foreground image on top of the background, and centered in the window. We can calculate the center point quite easily but because the point we pass to ApplySurface is the location of the top-left corner of the image we must also apply an offset to the point relative to the image's width for x and height for y to put the real center of the image at the center point of the screen.
In order to see our drawing we'll have to present the renderer and then have SDL wait for a second or two so we have a chance to see the image.
Finally, we wrap up the program by freeing the memory being used by the textures, renderer and window, quit SDL and return.
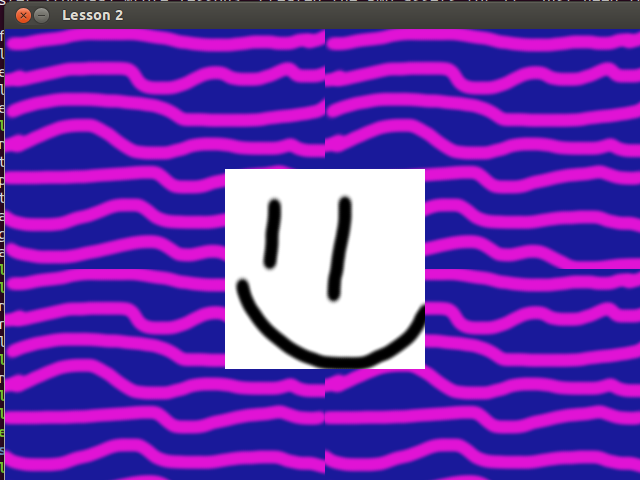
When you compile and run the program your window should look like this:


Lesson 2 Extra Challenge!

Find a way to convert our dumb method of tiling the background into a lean mean for loop! While it may not be so effecient for four background tiles, using a for loop for tiling is a very nice method for placing a large amount of tiles.
Hint


End of Lesson 2: Don't Put Everything in Main

If you have trouble compiling or running the program make sure you've set up the includes, include directories, linker settings and linker directories correctly, along with setting the correct path to the images and placing the SDL.dll in your executable folder. For Linux users there is no SDL.dll but instead make sure you have the runtime libraries in the correct place in your system.

I'll see you again soon in Lesson 3: SDL Extension Libraries!

Wednesday, July 11, 2012

Lesson 1: Hello World!

Deprecation Notice:

I've been updating the lessons now that SDL2 is officially released, please visit my new site on Github that has updated lessons and improved code.


In this lesson we will learn a simple method for drawing a bmp image to a screen, the image below to be specific.

You can download the image above by right clicking and selecting save-as. The link is a direct link to the image on the Github repository I have created and as such will be a true BMP image that SDL can load. The repository is also home to all my code from the tutorials and any related assets they need. If you ever lose the assets or want to take a peak at my code, grab it here. But never copy!

The first step as always is to include the SDL header
#include "SDL.h"
Note that depending on your SDL configuration you, Linux users to be specific, may need to do
#include "SDL/SDL.h"
//or
#include "SDL2/SDL.h"
//depending on your configuration
Unless you're specifying the full path to your header files in your flags (Linux users)

First we'll need to start up SDL so that we can use it, note that if SDL fails to initialize it will return -1, in which case we'll want to print out the error using SDL_GetError() and exit our program.

Special note for Visual Studio users: If you've set your System to Windows in your Linker options panel you won't get std out to console, to get this you must change your System to Console.
Next we'll need to create a window that we can draw things too, we can do this by using the SDL_Window:
The SDL_CreateWindow function takes care of making our window and returns a SDL_Window pointer back to us. The first parameter is the name we want for our window, followed by the x,y position we want to open it up at followed by the width and height we want our window to be. The last parameter are various flags we may want for our window, in this case we want it to pop up immediately, so we pass SDL_WINDOW_SHOWN.

We also take care of providing some error safety in that we initialize our pointer as a nullptr and then check to see if it's still null after trying to create the window. If creating the window failed it would still be null and as such we'd want to break out of program. It is important that you always initialize your pointers to NULL, or with the new C++11 standard to nullptr.

Now just opening up a window isn't going to do very much for us, we'll need something to render things to the window as well, so let's get an SDL_Renderer up and running.
Our renderer is created by SDL_CreateRender, which requires a window to render too. We can also specify a video driver to select, or put -1 to have SDL select the appropriate driver based on which is able to support the flags we specify. This is probably the best option to use, as you let SDL take care of picking the right driver for your needs, ie. the flags you pass as the last parameter.

In this case our flags are SDL_RENDERER_ACCELERATED because we want to use a hardware accelerated renderer, ie. the graphics card and SDL_RENDERER_PRESENTVSYNC because we want the SDL_RendererPresent function, which refreshes the screen to be run in sync with the monitor refresh rate.

Note that we use the same error checking method that we used when creating the window

It's time to load an image to draw to the screen! You should have downloaded the image from the Github repository and saved it in the same folder, or nearby to where your executable will be built too.

Although SDL 2.0 uses SDL_Textures for hardware accelerated rendering, we'll still need to load our image to an SDL_Surface using SDL_LoadBMP, as this lesson isn't using the fantastic SDL_image extension library (we'll get to it soon).
Note that you will need to change the filepath passed to SDL_LoadBMP to match the location of the image on your machine, or leave it the same if you've decided to follow my folder structure exactly.

To take advantage of hardware accelerated rendering we must next convert our SDL_Surface to an SDL_Texture that the renderer can draw.
We also free the SDL_Surface at this point because it is no longer needed.

We can now draw our texture to the renderer. First we clear the screen with SDL_RenderClear, then we can draw the texture with SDL_RenderCopy. Finally we update the screen with SDL_RenderPresent.
We also pass two NULL values to RenderCopy, the first one is a pointer to the source rectangle, ie. a clip to take of the image sheet while the second is a pointer to the destination rectangle. By passing NULL to both parameters we tell SDL to take the whole image (first NULL) and draw it at 0, 0 and stretch it to fill the entire screen (second NULL), more on this later.

We also tell our program to wait for 2000milliseconds with SDL_Delay so that we can see the screen. Without the delay the window would pop up and then close as the program finishes very quickly.
Before we exit our program it is necessary to free the memory used by our window, renderer and texture. This is done using the various SDL_Destroy functions
Finish the program by quitting SDL, and returning 0.
Compile the program and check it out! Don't forget to put SDL.dll in the same directory as your executable or you'll get an error pop-up. If you're using Linux you should already have the shared libraries installed in your path so you shouldn't have any issues

Congratulations on your first SDL 2.0 program!


Troubleshooting

If your program fails to compile make sure you've properly configured your libraries and linked to the correct path in your include statement.

If your program complains about SDL.dll missing, make sure it is located in the same folder as the executable.

If your program runs but exits with out displaying anything make sure your image path is set correctly. If that doesn't help try writing some cout or file output into the program, although depending on your platform and configuration settings cout may not appear.

End of Lesson 1

That does it for Lesson 1, I'll see you again soon in Lesson 2: Don't Put Everything in Main